
Vegan Bounty
These delicious no bake bars are easy to make and you only need 4 ingredients! As you probably can tell by the name, these are vegan version of Bounty - just a bit healthier (much less sweet). This amazing dessert is for all the coconut lovers and is gluten free too.

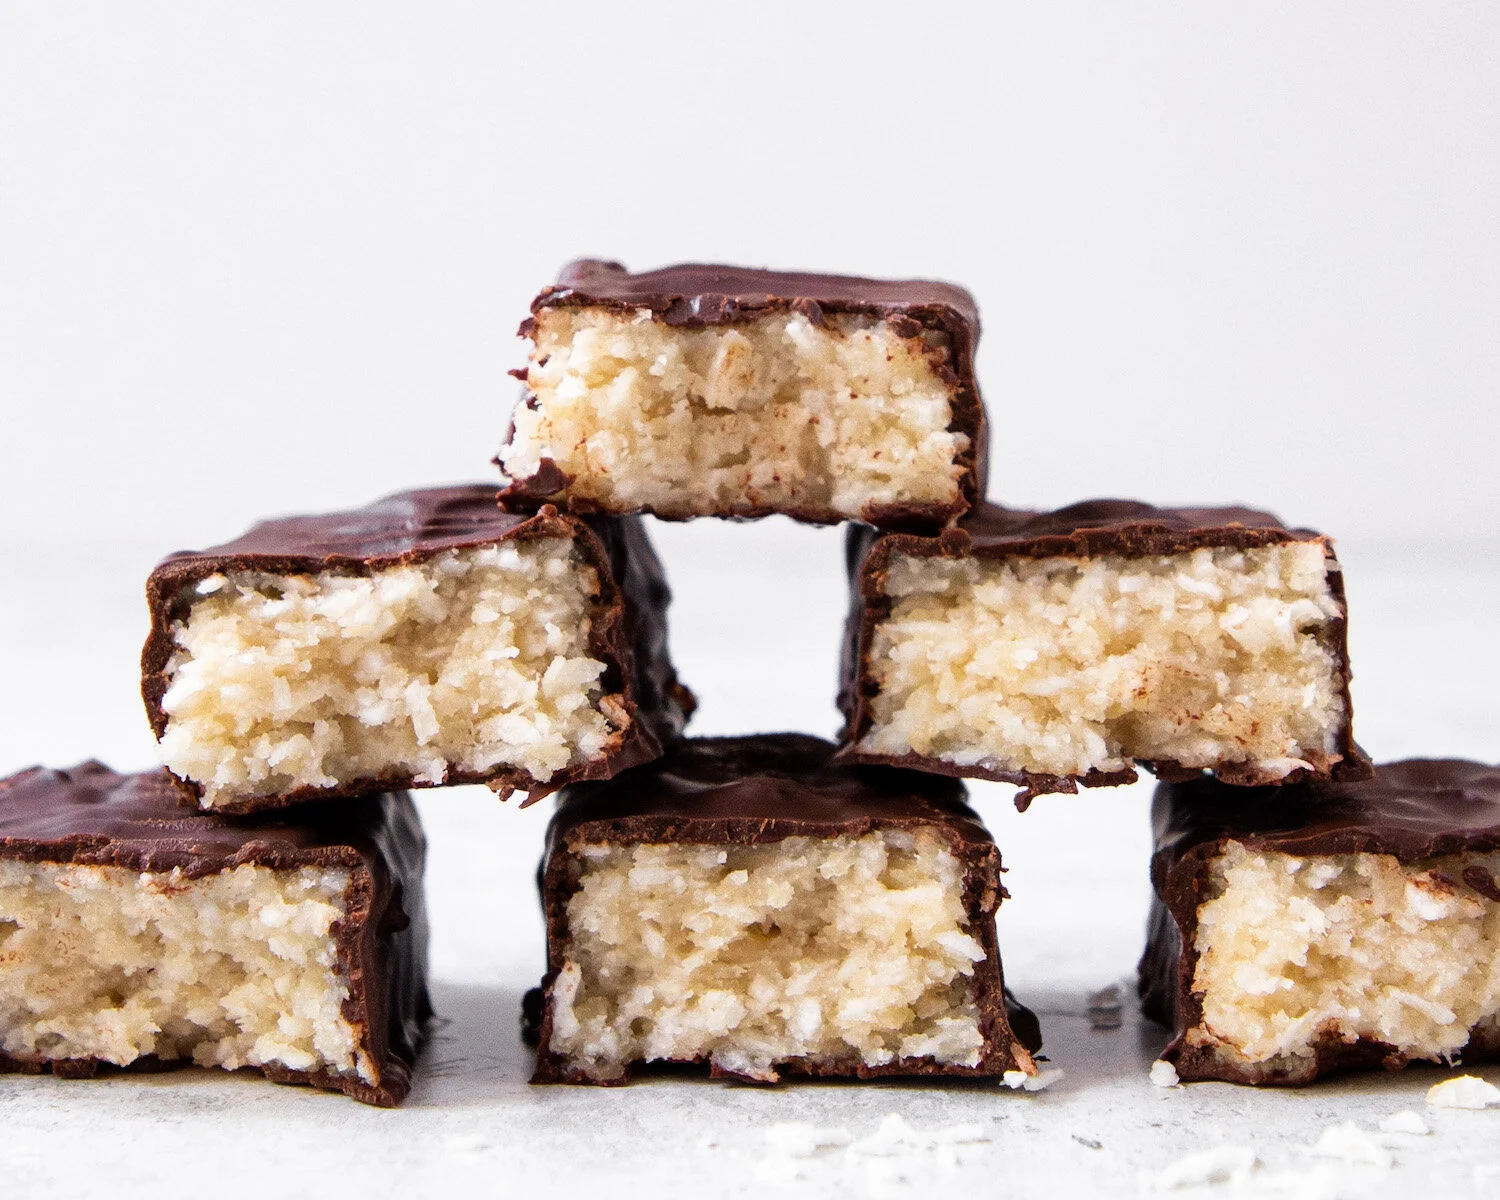
It is still warm so I’ll be over there, next to our fridge, waiting for no bake desserts. Like these vegan bounty bars - imagine soft, creamy coconut filling covered in tender dark chocolate. Sounds tasty, right? Well it is! And you don’t need many ingredients to make them, which is always a plus. I love randomly snacking on them during a hot day - they are nicely cold because they need to be stored in the fridge.
What ingredients do you need for healthy bounty?
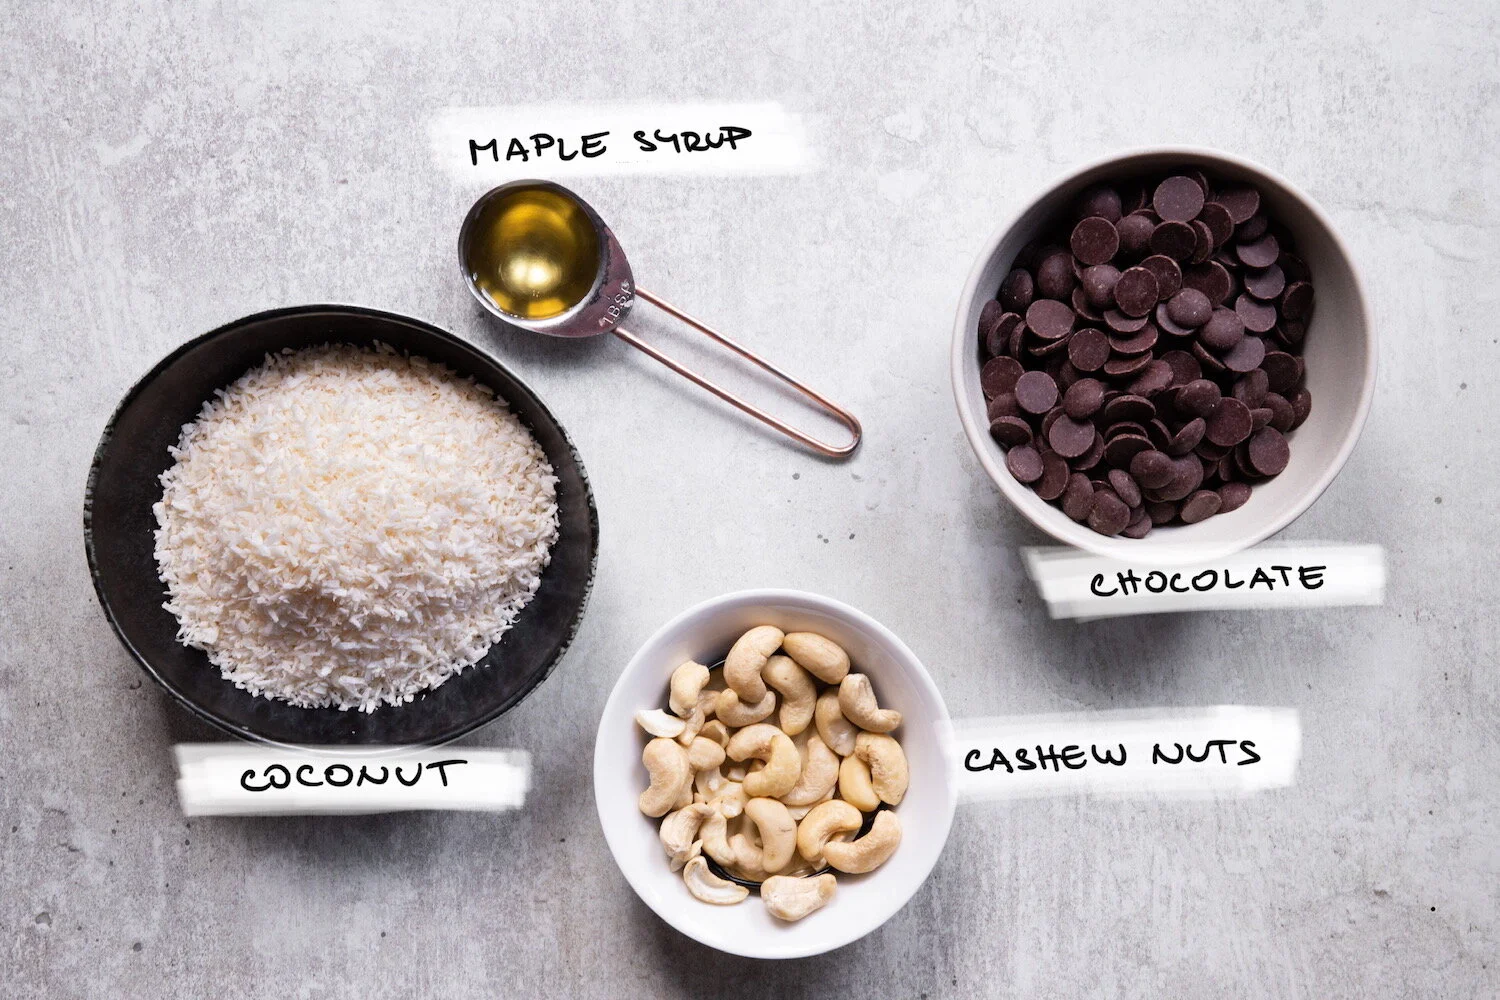
DESICCATED COCONUT (or know as shredded) - you will need to blend it in food processor until creamy but if you don’t want to do that, you can use coconut butter instead (yes, coconut butter, not coconut oil)
CASHEW NUTS - create that creamy base! You
DARK CHOCOLATE - I used 55% but you can use darker. I would recommend using high quality bar chocolate or high quality chocolate chips. It really makes a difference, especially in recipes with that few ingredients like this one.
MAPLE SYRUP - or any other syrup - agave, rice,… whatever you have at hand.
Step by step photos of how to make vegan bounty
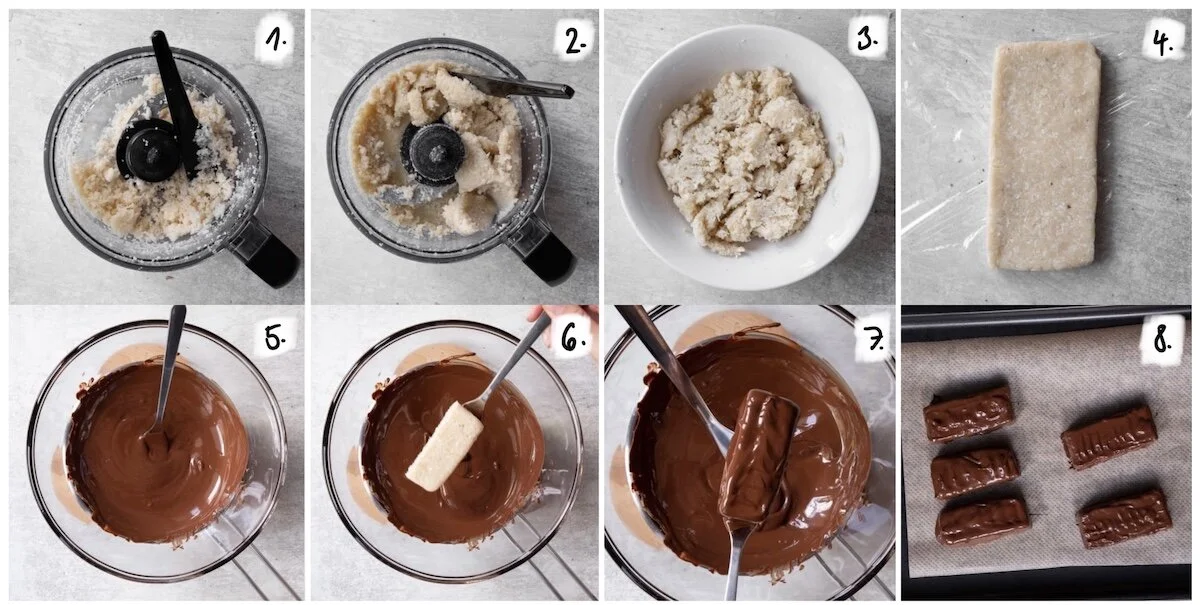
Blend half of coconut in food processor until creamy.
Add soaked cashews (without the water they were soaked in) and blend until creamy.
Add rest of the coconut and maple syrup and mix well.
Shape coconut paste into rectangular - or even easier is to line loaf tin or a square tin with cling foil and then shape it inside. Cover with cling foil and place into the fridge for about 30 minutes.
Melt chocolate in a heatproof bowl over a saucepan with simmering water (that bowl shouldn’t touch water).
Take coconut rectangular out of the fridge, cut into 10 pieces and start covering with chocolate.
Roll it over in chocolate to make sure all of it is covered, pick up on one fork and with another fork remove excess chocolate.
Place onto lined baking sheet with baking parchment and place into the fridge to set.
Tips and tricks
Can I shape them differently?
Of course you can! It is only up to you, however you want them to be shaped. You can cut them into smaller squares, different size of rectangular, cut hearts out of them.. You can even shape them into small logs with your hands (which is probably the easiest option).
Do I need to chill the coconut bars?
Yes. It makes it much easier to work with it if it’s cold. You could also place it in the freezer instead of fridge (for about 15 mins).
Do I need that much chocolate?
Yes and no. I used almost 250 g of chocolate because it is easier to have more chocolate to dip the bars into. The amount of chocolate you’ll actually use is less - I’d say more about 100-150 g. But if you use all the chocolate I recommend, it doesn’t mean that you’ll have to throw the rest out - after you’re done, pour it on baking sheet, let it dry, place it in a ziplock bag (or a box with a lid) and use whenever you need chocolate (into brownies, on weekdays evenings when you feel like everything is too much and chocolate is just what you need,…)
How to cover them the best in chocolate?
It looks tricky, I know. But honestly, the outcome will be delicious no matter how your chocolate and coconut bars will look like. But there are some ways how to make it easier - use two forks is one. Place one bar on top of one fork, place it into melted chocolate, roll around and when you think it’s ready, lift the bark up (still on the fork) and use the other fork to remove any excess chocolate.
How to store them?
In an airtight box in the fridge. Because the chocolate is not tempered, it gets warmer if stored in room temperature. If you want to temper chocolate (it is a process after which your chocolate will be crunchy - it will have that kind of snap and it won’t melt a bit when you hold the bar) - here is how.
For more vegan treats be sure to check out:
Vegan Semolina Pudding (this one is cooked for about 5 mins but very delicious)
If you make this vegan bounty and take photos of it, be sure to tag me on instagram - @bigbakesmanifesto and use hashtag #bigbakesmanifesto too! I love to see people making my recipes.
Makes 10 bars
Ingredients
180 g desiccated coconut
140 g cashew nuts
1 tbsp maple syrup (or other sweetener)
200-250 g dark chocolate* (chips or chopped chocolate bar)
Method
Soak cashew nuts in cold water for few hours (or over night).
Take half of coconut (90g) and blend it in food processor until it is creamy. It can take some time, especially if you have a blender that needs breaks - but around 5 mins. Towards the end you will need to crape coconut down towards blades (when the food processor is not on).
Add soaked cashews (without water) and maple syrup and blend more - this will only take around 2 minutes. Once this is done, mix in the rest of the coconut - it will become a paste that you can model.
Form a rectangular shape (I made two of those, each around 12cm x 8cm - but it doesn’t matter how big it is) from the coconut paste (it is the easiest if you line a loaf tin or a square tin with cling foil and shape it in it. I did it only with my hands because I wanted them slightly smaller than they would come out from tins). Cover with cling foil and place it into fridge for about half an hour.
Melt chocolate - place heatproof bowl over small saucepan filled with simmering water (the bowl shouldn’t touch water in the saucepan). Melt chocolate slowly over low heat and once melted, take it away from the heat.
Take the coconut shape from the fridge and cut in 10 pieces. Line a baking sheet (or just a plate) with baking parchment.
One after one dip coconut bars into melted chocolate - roll it over to cover all sides - it is easier to use two forks for this. Once whole of the bar is covered, remove it from melted chocolate and remove excess chocolate and place it onto the baking parchment.
Leave it to set in the fridge and once set, move to an airtight box and eat within 5 days.
Notes
I recommend using more chocolate because it is easier to dip it in.